This post is sponsored by The Home Depot. See full disclosure below regarding DIH Workshop.*
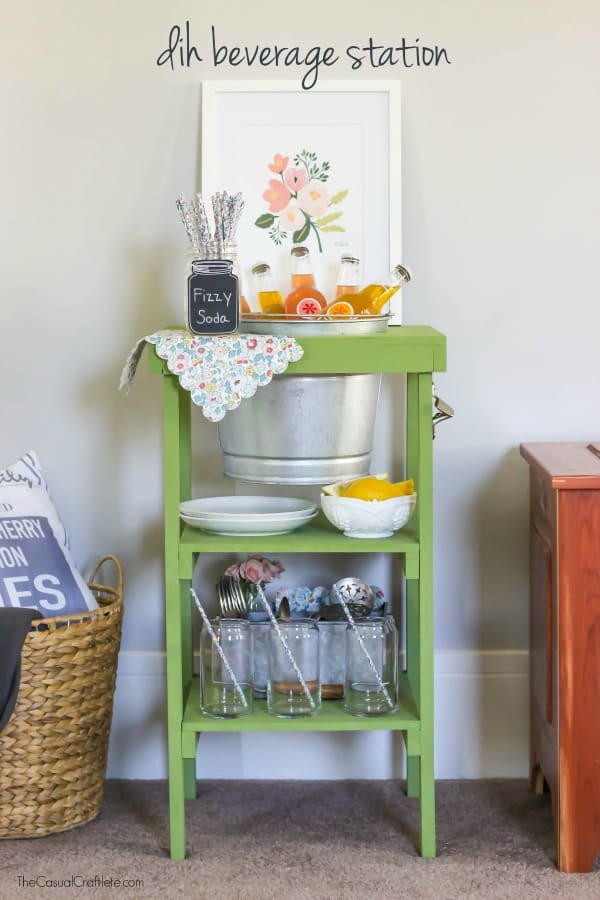
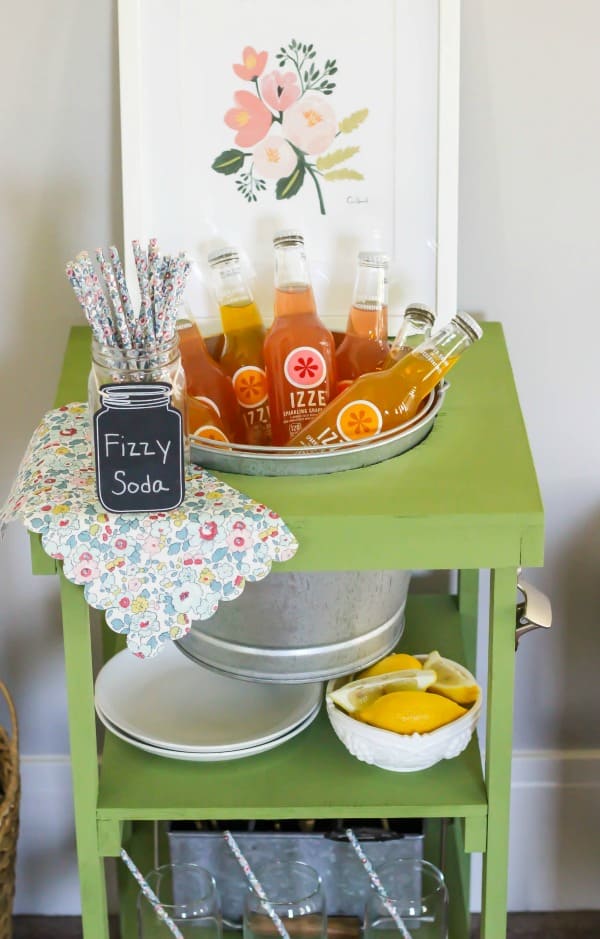
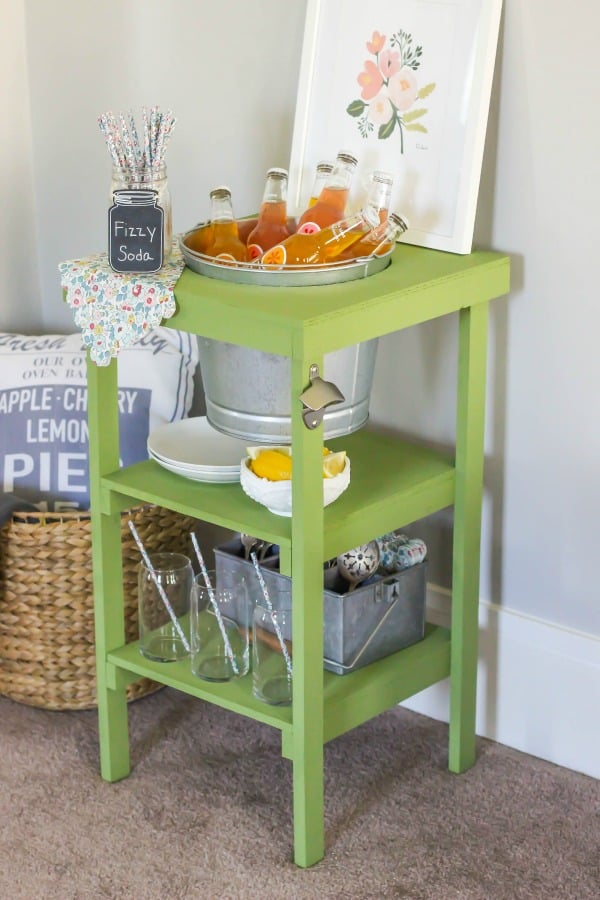
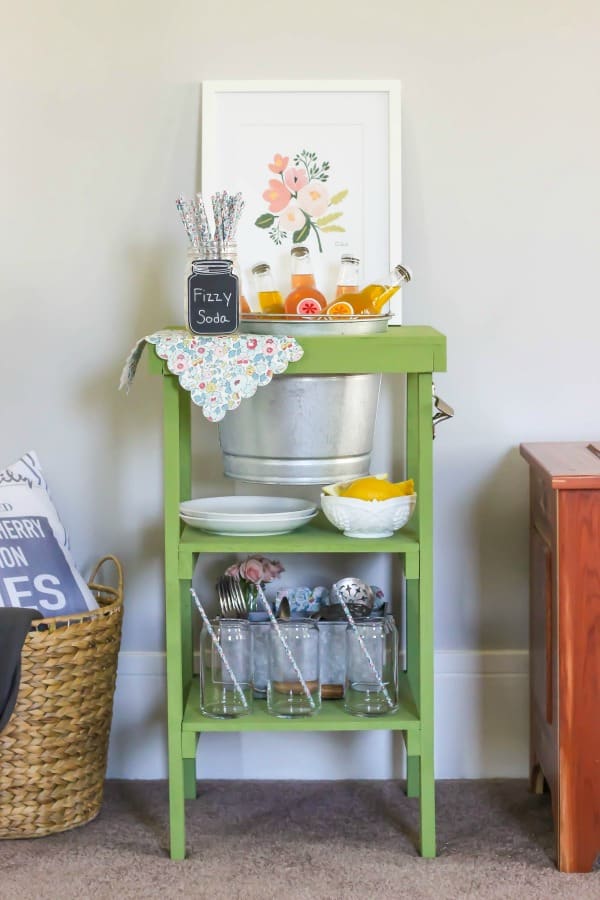
It’s time for The Home Depot’s #DIHWorkshop Virtual Party. With summer in full swing, my family and I have lots of birthdays and holidays to celebrate these warm summer months. This beverage station is perfect for parties! Today I am sharing my version and tutorial on how to build it.
Be sure to stick around until the end, because there are 20+ more beverage station ideas to spark your creativity.
Save the Date for Thursday, June 16th at 6:30 p.m to sign up to join your local Home Depot to make your very own Beverage Station.
Materials for Beverage Station:
• 1 – 1⁄2˝ x 2´ x 4´ Sanded Plywood Board
• 3 – 1˝ x 2˝ x 8´ Common Board
• 1 Box – 1 1⁄4˝ x 18 Gauge Brad Nails
• 1 – Twine / String
• 1 – Paint or Stain
• 1 – 10 Quart Galvanized Pail
Optional Materials:
• Stainable / Paintable Wood Putty
(not included in project cost)
Tools:
• Circular Saw
• 18-Gauge Cordless Brad Nailer
• Drill
• Drill Bits
• Measuring Tape or Carpenter’s Square
• Pencil
• Safety Goggles
• Sanding Block
• Reciprocating Saw
Instructions:
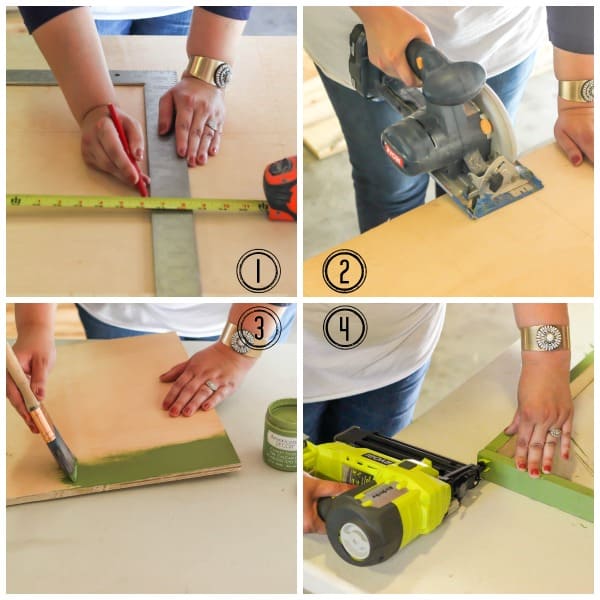
STEP 1. MEASURE AND MARK
Measure and mark the long and short frame boards, and the shelf braces from the (3) 1˝ x 2˝ x 8´ boards, and the three shelves from the 2´ x 4´ plywood board. Reference the cut list below for the measurements.
Cut List:
From the 1˝x 2˝ x 8´ Boards
(4) 1˝x 2˝ x 28 1⁄2˝ Legs
(2) 1˝x 2˝ x 16˝ Long Frame
(2) 1˝x 2˝ x 14 1⁄2˝ Short Frame
(4) 1˝x 2˝ x 14 1⁄2˝ Shelf Brace
From the 2´ x 4´ Plywood Board
(1) 16˝ x 16˝ Top Shelf
(1) 141⁄2˝ x 13˝ Middle Shelf
(1) 14 1⁄2˝ x 13˝ Bottom Shelf
STEP 2. CUT
Using a circular saw cut the legs, long and short frame boards, and the shelf braces from the (3) 1˝ x 2˝ x 8´boards, and the three shelves from the 2´x 4´plywood board. TIP: Smooth any rough ends with a sanding block.
STEP 3. PAINT OR STAIN
Paint or stain. TIP: Use a stainable / paintable wood putty to fill in nail heads and touch up with paint or stain used after step 8 assembly. I used a green color chalky finish paint.
STEP 4. CREATE TOP SHELF FRAME
Stand the (2) 16˝ long frame boards on end and parallel to each other. Sandwich the (2) 14 1⁄2˝ short frame boards between the long boards to create a 16˝ x 16˝ square frame and secure with brad nailer.
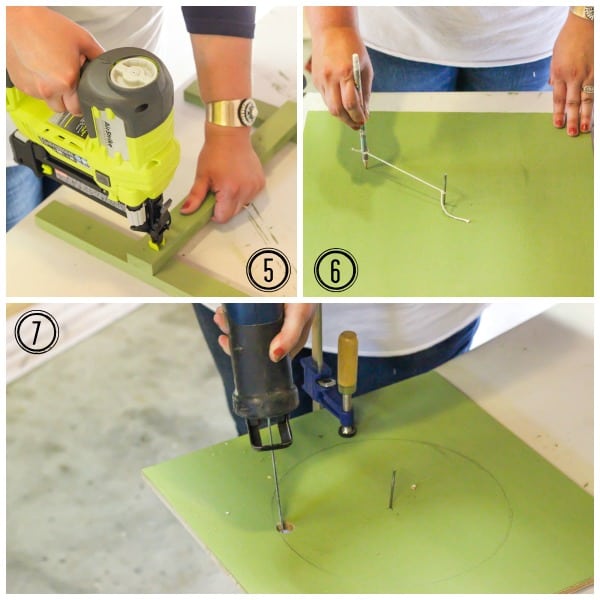
STEP 5. CREATE LEG FRAMES
Lay (2) legs flat 14 1⁄2˝ apart. Using brad nailer, attach (2) 14 1⁄2˝ shelf braces to legs with the first attached at 7 1⁄2˝ up from the bottom of the legs (for bottom shelf) and the second attached at 171⁄2˝ up from the bottom of the legs (for middle shelf). Repeat with the other (2) legs and shelf braces.
STEP 6. DRAW CIRCLE IN TOP SHELF
Mark the center of the 16˝ x 16˝piece of plywood. Hammer a nail into the center mark and tie a string around the nail head on one end and to a pencil on the other end, ensuring that the string when stretched from nail to pencil is 5˝ and draw a circle, keeping string tight. You should have drawn a 10˝ diameter circle.
STEP 7. CUT CIRCLE IN TOP SHELF
Next, using a 1⁄2˝ drill bit, drill one hole inside the edge of the circle. Using the reciprocating saw, cut the circle out around the edge.
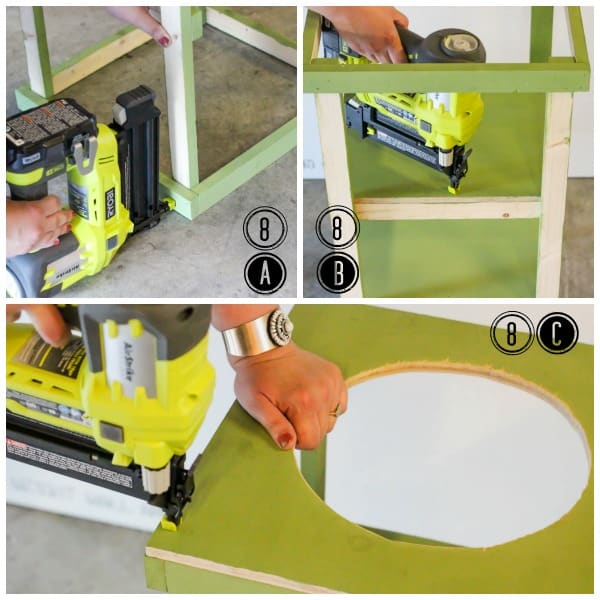
STEP 8. ASSEMBLE BEVERAGE STATION
(A) Place top shelf frame on flat surface and insert leg frames upside down into frame with shelf braces facing inward, keeping legs flush with the corners and top of frame. Secure with brad nailer.
(B) Ensuring legs are secure, turn station over and lay (1) 14 1⁄2˝ x 13˝ section on top of the bottom shelf braces and secure with brad nailer. Repeat with 14 1⁄2˝ x 13˝ piece for middle shelf. TIP: Attach bottom shelf first, then middle shelf.
(C) Finally, place the 16˝x16˝ piece on top of shelf frame and secure with brad nailer.
After assembling the beverage station, it’s time to stock it with supplies.
I am throwing a fun garden party complete with floral straws, napkins, and colorful fizzy soda.
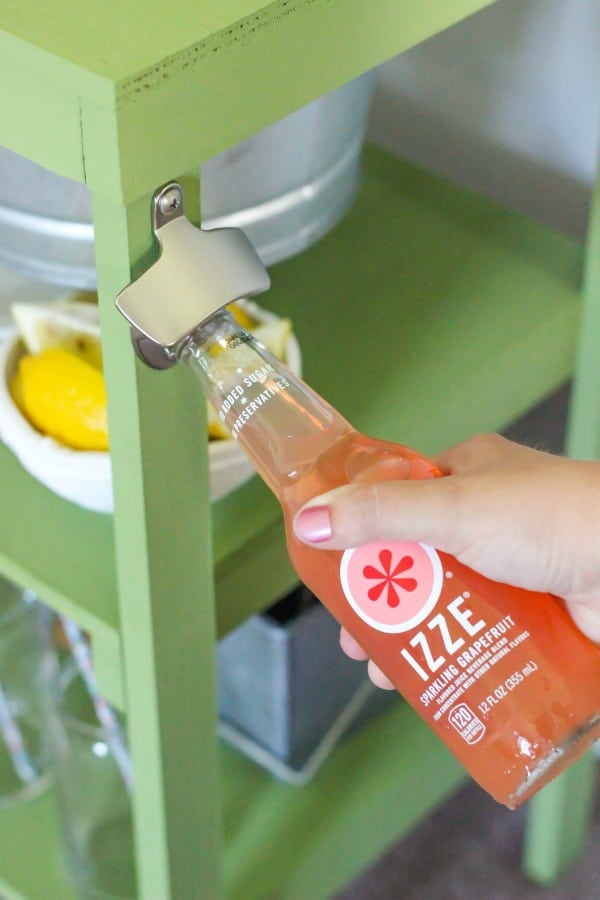
I installed a satin nickel bottle opener to the side of the beverage station, making it easy to open those fun beverages.
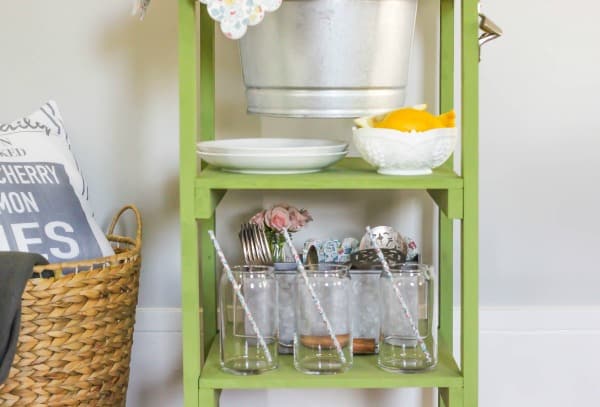
The beverage station is great for storing and display glasses, silverware, plates, and more!
I just love how it turned out. This beverage station is great for the patio, porch, or even inside your home!
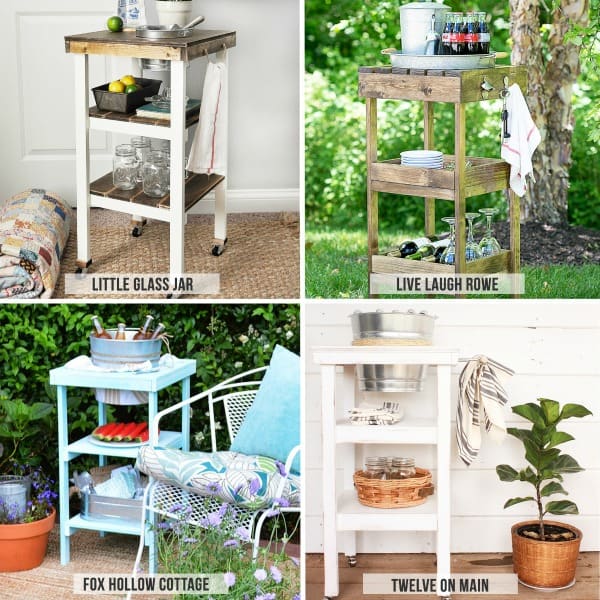
A BIG thanks to Kelly from Live Laugh Rowe for inviting me to join in on the fun. Now, let’s take a look at the rest of Kelly’s team:
Little Glass Jar | Live Laugh Rowe
Fox Hollow Cottage | Twelve On Main
Let’s check out the rest of these amazing beverage stations!
Just Between Friends | One Horse Lane | The Crafting Chicks | Family Food Fun
Inspiration For Moms | Petticoat Junktion | Our Southern Home | Artsy Chicks Rule
Iris Nacole | The Rustic Life | Domestically Speaking | The Creative Mom
Little Vintage Nest | One Artsy Mama | Dagmar’s Home | Fancy Farm Girls
All Things Thrifty | Whipperberry | Lolly Jane | Landee See Landee Do
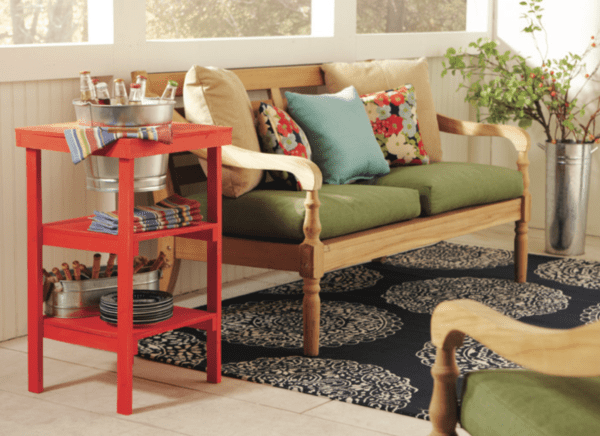
Here is a reminder of what the original project looked like:
I hope you are feeling inspired! Ready to sign up for the June Workshop and make your own Beverage Station? The Home Depot’s Workshops are designed to provide a mix of associate-led instruction, demonstration, and some hands-on learning. The workshops are also for do-it-yourselfers of all ages and experience levels! Materials can be purchased to make your own project too. For more information, contact your local Home Depot store. Register today!
A HUGE THANK YOU TO THE HOME DEPOT FOR SPONSORING THIS POST!
*The Home Depot partners with bloggers such as me for DIH Workshop program. As part of this program, I received compensation for my time. They did not tell me what to purchase or what to say about any product mentioned in these posts. The Home Depot believes that consumers and bloggers are to form their own opinions and share them in their own words. The Home Depot’s policies align with WOMMA Ethics Code, FTC guidelines and social media engagement recommendations.
Your beverage station turned out so great! I had fun making mine.
Thank you so much! I can’t wait to see yours!!!
It’s so fun to see all the versions! LOVE your colors, girl!
XO